Five things to know before tackling a snowshoe trip beyond the official winter trails in Cypress and Seymour Provincial Parks
This post is intended for anyone who is considering backcountry winter travel beyond the official winter trails in Cypress Provincial Park and Seymour Provincial Park. Two examples of destinations that lie beyond the marked winter trails are St. Marks Summit and Tim Jones Peak.
The advice from BC Parks is that travel beyond the marked winter trails is not recommended and every year people are injured or lose their lives when they travel beyond these signs.
The purpose of this post is to provide perspective on the mindset and preparation that is required to travel responsibly if you venture into these areas.

Introduction: The three types of routes
For starters, it’s important to recognize that there is a meaningful difference between the three types of snowshoe routes at Cypress and Seymour Provincial Parks.
First, there are front-country trail networks maintained by each resort. These trails have a small fee and are an excellent option for anyone who is new to the activity or new to the region. Although you need to make sure you dress appropriately and don’t stray from the trail, you can travel on these routes without avalanche safety equipment or navigation equipment.
Second, there are six backcountry winter trails that are marked with winter poles by BC Parks: Dog Mountain, Brockton Point, First Pump Peak, Hollyburn, Black Mountain, and Bowen Lookout. These are backcountry trails with avalanche risk and you responsible for having the appropriate training and equipment.

These trails are never closed; even when there are high levels of danger. You take full responsibility for your own safety when you travel on these trails and you should be prepared by carrying the ten essentials and leaving a trip plan with an emergency contact.
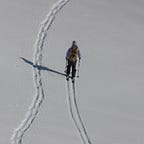
Third, there is travel beyond the marked winter trails. This includes everything outside of the first two categories. Many of these routes follow the same path as summer trails but they are not marked for winter travel and they cross terrain that can be very dangerous in the winter. Travel on these routes is the focus of this blog post.
1) Avalanche training is a must
Although the marked pole routes also have avalanche dangers, the risk can increase significantly once you travel further. As an example, the route to St. Marks crosses multiple avalanche paths that regularly slide across the trail. Winter sports are increasing in popularity and there is concern that not everyone is enrolling in the proper training or carrying the proper equipment before heading into avalanche terrain. Fifteen lives were lost to avalanches in the United States during the week of Jan 30th to Feb 6th 2021, making it the deadliest week since 1910.
Although avalanche training is also recommended before travel on the marked backcountry winter routes, it is should be viewed as absolutely essential before travelling beyond the marked winter routes. This is true whether you are travelling on skis, snowshoes, or crampons. In Canada, the basic course is called the AST-1 and costs approximately $300.
2) Active navigation
When travelling on one of the six marked winter trails, you are navigating by following poles (e.g, passive navigation). When venturing beyond, you need to navigate against a planned route that you have established ahead of time. Markers on trees that are used for summer navigation are routinely covered in snow in the winter and the footprints of other people can not be followed reliably.
I believe that a handheld GPS unit with a carefully planned route and extra batteries should be carried for all winter travel beyond the marked winter trails. Smart phone apps are OK but smart phone batteries die and phones are delicate. A map and compass are still essential but a GPS has the added capability of showing you exactly where you are at any given time.
It’s important to be careful about any tracks that you load into your GPS or that come pre-loaded into the device. Many websites and apps rely on crowdsourcing from the public and there are errors and also routes that are only appropriate in the summer. I suggest that you view any track in Google Earth and carefully study it to make sure it makes sense and to familiarize yourself with it. Ideally, you will be able to confirm with someone who has travelled the route in the winter that your planned route is reasonable. Once you are on the mountain, careful attention is required to manage travel around micro-terrain that does not show up on topographic maps or satellite images.
A headlamp and spare batteries should also be considered mandatory on on any trip. Winter days are short and a simple injury or equipment problem can easily double the length of a trip. Navigation without light is all but impossible.
3) Slip and fall accidents, snow bridges, treewells, and knowing when to turn around
Snowshoes work well in reasonably soft snow where floatation is required to prevent post-holing but they are often very dangerous on steep terrain when conditions are icy. (See these two great articles from a SAR professional for more information: How to Kill Yourself Snowshoeing and How to NOT kill Yourself Snowshoeing). When the snow is firm or icy, micro-spikes are often much safer. It is also possible to encounter conditions where crampons, ice-axe and a helmet or even ropes, harnesses and anchors may be required. On the North Shore, this can even be true on trails that would be a hike in the summer. The traverse between Tim Jones Peak and Mount Seymour is one example of a dangerous location where multiple people have suffered slip and fall accidents in the winter.
It’s a good idea to complete basic mountaineering training before attempting to use tools such as crampons, ice axes and ropes because they can be dangerous if used incorrectly. Local mountaineering clubs (ACC, BCMC) and mountain guides offer introductory mountaineering courses that are a lot of fun and very educational.
In addition to slip-and-fall danger, it’s important to take care with snow bridges over creek crossings and to be aware of of the danger from tree wells/snow immersion suffocation.
Most importantly, as you venture into more challenging terrain, you need to have the mindset that you will not always reach the intended destination. Turning around if travel becomes unsafe is the most important skill that you can have and it’s important to make sure that everyone in a group is aligned on that mindset before you step foot onto the route.
4) Can you pass the Broken Ankle Test?
This is the most useful exercise I go through when packing a bag at any time of the year. No matter how prepared and experienced someone is, we could all break an ankle, sprain a knee, or dislocate a shoulder and become immobile. If that happens, you need to be able to let SAR know that you will need a rescue and you will need to survive until they arrive. Very small actions can result in significant differences in response time and survival time in the Broken Ankle Test.
Consider the difference between carrying a satellite beacon (immediate communication that you need help and the ability to communicate your precise location), vs only leaving a trip plan (help not summoned until you fail to return and they will have to search the entire trail) vs neither (help may not be summoned for multiple days and there may be multiple trails that they will have to search.) No matter what you do, always leave a trip plan because satellite beacons are not 100% reliable and the trip plan will contain a lot of useful information for rescuers if you do succeed at sending an emergency signal from a satellite beacon. There are some apps (Overdue, Adventure Smart) that make the process of leaving a trip plan very easy.
Also consider the difference in survival time between packing a large puffy jacket, a dry pair of mitts with chemical hand-warmers, dry socks, dry toque, emergency bivy, and an extra liter of water with electrolytes vs only having an extra fleece. Small changes in what you throw in your backpack can add many hours to the length of time you can survive if you do become immobile.
There is no set recipe for how to pass the Broken Ankle Test but think about your specific situation carefully, thoughtfully, and realistically to make sure that your systems will be sufficient. It’s not enough to throw a handful of matches in your emergency kit if there is little to no chance that you would successfully be able to use those in a winter storm when the ground is covered in 10 feet of snow and everything is wet. Never underestimate how quickly hypothermia will set in if you need to stop moving and your clothes are wet with sweat. If you are travelling in a group, make sure that everyone in the group can independently pass the test. If anyone can’t, they are more of a liability than an asset in an emergency situation.
5) When things go wrong
Despite the best laid plans, things can go wrong. In the mountains in the winter, it is easy for panic to set in when that happens. If you do get lost or injured, it is important to stay calm and to remember two things.
First, do not wander and do not go downhill. The most extreme terrain on the North Shore is found in cliff bands, gullies, and waterfalls that often lie below the elevation of the trails. A common theme in serious incidents on the North Shore is that someone becomes disoriented or injured and starts to travel downhill along the path of least resistance in search of help but runs into very dangerous terrain. If you are lost, ideally stay put and never go downhill.
Second, if you are fortunate enough to have cell reception do not hesitate to call 911. All SAR teams are dispatched by the RCMP and so you or your emergency contact will need to call 911 if you need help. By dialing 911, you also provide emergency responders with a chance to determine your location. All Search and Rescue in British Columbia is free. People need help from SAR on a regular basis for a wide range of reasons and SAR teams respond without judgement. SAR volunteers want subjects to call as early as possible because it makes the rescue much simpler and safer for the volunteers.
Closing thoughts: Not a walk in the park
Travel beyond the marked winter routes in Cypress and Seymour Provincial Park can be rewarding but it requires extensive preparation. Pictures on social media may lead people to underestimate the amount of training and equipment that is required.
This post is not intended to discourage anyone from exploring these areas. Your journey to these destinations may take time as you enroll in courses, acquire the equipment, and gain experience. I have found the preparation and development of skills to be a particularly rewarding part of the adventure.
Happy Hiking,
Steve
stevejoneshikes@gmail.com